
//Home/Hacks&Mods/SE30_CD-Rom/
For those of you not familiar with the SE/30, here's a brief rundown of the facts
The SE/30 is the finest compact Mac Apple ever produced, second only to the highly sought after Colour Classic I & II (although the SE/30 is a much better machine than the original Colour classic). It has the same all in one design as the earlier SE, but is much faster. Originally designed to take a maximum of 32mb of RAM, by using 16mb simms you can bump it up to a whopping 128mb!
Although slow by modern standards, the SE/30 is ideal for email, newsgroups, Irc, or writing HTML code in BBEdit.
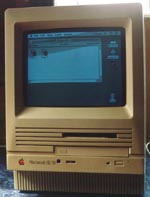
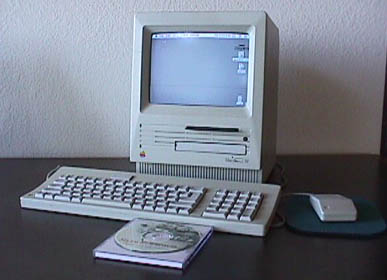
Anyway, onto my Mac. My SE/30 has 32mb of RAM, an 850mb Quantum Fireball hard drive and is running System 7.5.5.
You can of course attach an external CD-Rom drive via the SCSI port on the back of the machine, but this means an extra power socket is needed, and you end up with leads everywhere. This way everything is neatly stored in the one box.
It also makes a dandy CD player! Just connect it up to an amp and you're away! Or plug some headphones into the front and chill while you work!
**************WARNING**************
This is the way I did it. There are many other possibilities, the better ones will come to you when you've finished.

Long T-15 wrench
Assorted screwdrivers
Glue
Hacksaw
Needle files
Spanners
Drill
Pliers
Several hot cups of tea
Digestive biscuits
50 pin SCSI CD-Rom drive (Toshiba)
Half height floppy drive taken from an LC475
SCSI cable with 2 drive connections
Standard PC power splitter
3.5" to 5.25" mounting brackets
The plan goes thus :-
The SE/30 floppy drive is full
height. Take this out and fit the CD-Rom in it's place, cutting a
section out of the front of the case for the tray to pop
out.
Above that fit the slimmer floppy
drive from the LC475 and the hard drive into the existing hard drive
cradle. Then cut a new slot for the floppy drive.
The floppy drive screws to the
inner cage. The hard drive cradle then screws to the floppy drive.
With the CD-Rom drive replacing the floppy, it may be tricky to fix
the hard drive cradle.
Can the PSU cope with the extra
demand? Yes, apparently so.
The CD-Rom drive covers the only
expansion slot. We may never be able to add a network
card.
The internal speaker is in the way
and will need to be relocated.
Note: These sections are also relevant if you're opening up a Mac SE or a Plus.
Using the T-15 wrench, undo the 4 screws. The two black ones at the bottom, and the two deep in the handle. I made my own long wrench by cutting an L shaped tool and using it in a cheap multi-bit screwdriver. You can use a long flat head screwdriver if you've one the right width, and if the screws are not too tight, but this isn't recommended as you can damage the screw heads.
If your Mac has the reset button on the side, take it off. It's just clipped on.
Place the Mac face down and gently pull the back of the case away.
Well done, have a slurp of tea.
Remove the shielding from the bottom of the Mac.

Carefully pull the floppy cable from the board, followed by the hard drive cable. Slide the board towards you a fraction so you can get your big clumsy hand to the power cable. On the back in the middle of the connector is a catch. Squeeze the catch at the top and gently disconnect the cable.
Now slide the logic board up until the notches on the right side match up with the notches on the cage. Gently lift the board out then pull away from the left side, but not too far as the speaker cable is still attached. Make a mental note of where the speaker cable is plugged in and remove.
Place the board somewhere safe. You don't want to sit on it, you really really don't. And try not to put your cup of tea on it too.
Well done again, take several slurps of tea, and dunk a biscuit.
Unscrew the hard drive cradle from the floppy drive and remove. Then remove the four screws fixing the floppy drive, and remove the drive.
That's the easy bit. So no tea.
The Speaker:
The speaker has four fixings, but only two of them are actually holding in the speaker. I cut one of the fixings and then gently twisted the speaker out. The lip was then cut away to allow the CD-Rom drive to go right up to the front of the case. Some of the lip can be twisted out with a pair of pliers as the plastic is quite soft, but care must be taken as some of those grooves at the front are vents that are only fixed in a couple of places, so they are quite flimsy once you start prodding around.
Once the speaker was free the cable was stuck between the front case and the cage. I removed the two screws under the cage, prised the cage and front cover apart slightly, and then slid the wire left (away from the PSU) until it came free, then just pulled it out.
Tricky and awkward, dunk another biscuit, and refill mug if needed.

I used an old Toshiba drive. The standard Apple driver doesn't support it, but separate drivers are available. Or you can modify the Apple driver with ResEdit which may then do the job. More on this at www.ResExcellence.com
Using a paperclip I opened the drive and removed the front of the tray, and then the front cover of the drive itself. Then I replaced the front of the tray. Why? If you don't do this the drive will be too far back in the case when fitted.
Next I placed the drive in position, then marked on the front of the tray the position of the floppy drive slot. Then I removed the drive and the front of the tray, placed the front of the tray over the slot and lined up the marks. Then I marked out where the hole for the tray needed to be cut.
When the CD-Rom drive is eventually in place, the bottom of the drive is at the same level as the bottom of the floppy drive slot. So the floppy drive slot just needed to be extend for the bottom cut. The top's not as easy. The groove above the tray is a vent, and a bit flimsy. You could of course remove the groove completely but then the hole for the tray would be too high, and not look right.
The case is very soft plastic and easily cut. You should take your time and cut well inside the lines, widening them with the needle files or knife afterwards to the correct size.
Once the tray hole was cut the drive was placed in the Mac to make sure it was about the right size, and in the right place! Small adjustments can be made later.
The original CD-Rom cover was then fitted over the hole, and any protruding bits of plastic were broken off the back. Then, using the cover as a template I marked out where the holes needed to be cut for the headphone socket, volume control, LED and eject button. The smaller holes were cut by drilling first and then filing them out.
This is time consuming. Slurp your tea as required. Don't overdo the biscuits.
The CD-Rom drive then sits nicely up to the case, with everything sticking through as it should.
You don't have to cut holes for the headphone socket and volume control of course, but if your drive has them you would have to remove them, otherwise the drive won't sit up to the case. Also remember that the volume control only effects the headphone socket. The audio out on the back of the drive is unaffected by it, and the Mac itself cannot control the CD volume.
Fixing the drive in place:
The drive was screwed to the cage from underneath. Amazingly, 3 of the 4 fixing holes on the bottom of the drive lined up with existing holes already in the bottom of the inner cage.

The back of the drive needed to be raised until the front of the tray was in the right position. The CD-Rom was fixed to the cage using the front two fixings, and then the back was raised using nuts, which were wedged and then glued into place.
Then the power was connected to the CD drive and it was switched on, just to make sure the tray opened and closed properly.
Tricky this one. The drive had to lay straight on top of the CD drive for the slot to be in the right place, so it needed to be fixed from the side. You could of course glue it to the CD drive, but then you'd struggle if you ever needed to replace either the floppy or the CD-Rom in the future.
Using two brackets designed to fix a 3.5" hard drive into a 5.25" drive bay, the answer was found.
With the drive held in place I cut out a section of the case for the floppy disk. The hole was made a little wider at one side so the disk could be pushed right in.

Then one bracket was fixed to the drive. Then the bracket was fixed to the front expansion card fixing.
The cage is a little flexible here so to keep the floppy drive lined up the back of the bracket was spaced with a bolt and several nuts.
Before attempting the fix the drive I extended the wires for the LED and connected them to the drive.
I fixed the second bracket to the other expansion card fixing hole, and then trapped the front behind one of the washers used on the spacing bolt. This also holds the floppy drive in place.
The hard drive was then fixed to the bracket. I found that the drive had to be fixed with the power and SCSI connector towards the tube, otherwise the bottom of the screen image was bowed up in the centre, which caused distortion to any horizontal images. The drive also needs to be as far back as possible, to prevent distortion. This may vary depending on what make hard drive you use.
This was mounted to the back of the cage using an existing screw.
The LED lens was removed to make way for the floppy drive. I then cut a small slot below one of the vents to one side of the new floppy drive slot and glued this in place. The LED was held in place behind the lens using soft putty. You could also glue it in place.
Once the drives were fixed, it was time to fit the logic board back in place. The speaker cable was reattached first, then the board was slid into place.
Then all the leads were reconnected to the drives and also the logic board. The power splitter is used to connect to the CD and hard drives. The floppy drive has power and data fed through the one lead. My 2 way SCSI cable was plenty long enough. The floppy cable was only just long enough to reach.

With everything reconnected, I plugged it in to see what would happen. A pleasant 'Ding' sound was made, and it booted up like the trooper it is! The CD-Rom extension was installed before the modification to save hassle. Then the CD and floppy drives were tested before putting the case back together.

A fresh mug of tea was then made, and the remaining biscuits were dunked.
If the SE/30 is going to be permanently connected to an amp, it would be tidier to mount an audio jack on the back of the Mac (like the standard audio out already there), and connect it to the audio out on the back of the CD-Rom drive.
Some of the cutting is still a little rough and needs tidying, perhaps some rubbing down with very fine paper will sort it.
Before the hard drive was turned around, the bottom half of the screen suffered from bad distortion. It was a severe bowing upwards. That has now gone, although about a inch from the bottom of the screen there is a small strip that bows very slightly, without affecting the display above or below it. But this is very minimal, and isn't really noticeable.
If you put the slimmer floppy drive in the same place as the original then the slot doesn't line up. Leaving the original floppy fitted and then mounting the CD-Rom above it is a possibility, although that would be really cramped, and it's unlikely that you would fit everything in. You could of course forget about the floppy all together, but this depends how much you need one. If you only use a floppy for reinstalling the OS then you could use an external drive.
Fitting a slot loading CD-Rom drive would look much neater, especially if you just cut a slot for the CD, and forgot about the buttons and lights etc.
It may also be possible to mount a slot loading CD-Rom pointing upwards. A slot could then be cut in the top of the case front to back, and the CD would be dropped in like a toaster, just like the DVD drive on the G4 Cube!
And of course, why stop at a CD drive? Jaz drives or tape drives could be fitted. If you fitted one of these and managed to squeeze a network card in too you'd have a great back-up server.
There's no reason why this couldn't be done with a Mac SE, as they use the same case.
There's no internal SCSI on a Mac Plus, so installation would be tricky. Also the Plus didn't have the best PSU in the world, so it would probably be too much of a strain for it.
I've never seen the inside of a Classic or Classic II so couldn't say. Although the Classic has a curved front so a slot loading drive would be in order.
Paul took his trusty SE, upgraded it to an SE/30, then took the next step and added a CD-Rom! Nice one Paul!
//Home/Hacks&Mods/SE30_CD-Rom/